//++++++++++++++++++++++++++++++++++++++++++++++++++++++++++++++++++
// ReShade effect file
// visit facebook.com/MartyMcModding for news/updates
//++++++++++++++++++++++++++++++++++++++++++++++++++++++++++++++++++
// MasterEffect ReBorn 1.1.190 public beta by Marty McFly
// Continuation of MasterEffect 1.6.1
// Copyright © 2008-2015 Marty McFly
//++++++++++++++++++++++++++++++++++++++++++++++++++++++++++++++++++
/*==============================================================================*\
| GLOBAL PARAMETERS |
\*==============================================================================*/
#define MASTEREFFECT_TOGGLEKEY 192 //[depending on keyboard layout] Key used to toggle all MasterEffect effects. See ReShade documentation for more info.
#define USE_DEPTHBUFFER_OUTPUT 0 //[0 or 1] Depth Buffer Output: Shows you the pixel depth, this is for debugging or depth map creation only.
#define USE_SPLITSCREEN 0 //[0 or 1] Splitscreen: Disables all effects on the right half of the screen to show changes.
#define USE_HDR_LEVEL 0 //[0 to 2] HDR Level: Rendering bitrate. 0: RGBA8 | 1: RGBA16F | 2: RGBA32F
#define USE_HUD_MASKING 0 //[0 or 1] HUD Masking: Uses a texture mask (mcmask.png) to exclude certain screen areas from effects processing.
/*==============================================================================*\
| ENABLE EFFECTS |
\*==============================================================================*/
//COLOR
#define USE_LUT 0 //[0 or 1] Color Lookup Table: Uses a gradient texture to adjust the colors of the image.
#define USE_CARTOON 0 //[0 or 1] Cartoon : "Toon"s the image.
#define USE_LEVELS 1 //[0 or 1] Levels : Sets a new black and white point. This increases contrast but causes clipping. Use Curves instead if you want to avoid that.
#define USE_TECHNICOLOR 0 //[0 or 1] Technicolor : Attempts to mimic the look of an old movie using the Technicolor three-strip color process. Algorithm from prod80
#define USE_SWFX_TECHNICOLOR 0 //[0 or 1] Technicolor : Attempts to mimic the look of an old movie using the Technicolor three-strip color process. Algorithm from SweetFX
#define USE_DPX 0 //[0 or 1] Cineon DPX : Should make the image look like it's been converted to DXP Cineon - basically it's another movie-like look similar to technicolor.
#define USE_MONOCHROME 0 //[0 or 1] Monochrome : Monochrome makes the colors disappear. No control values.
#define USE_LIFTGAMMAGAIN 0 //[0 or 1] Lift Gamma Gain : Adjust brightness and color of shadows, midtones and highlights.
#define USE_TONEMAP 0 //[0 or 1] Tonemap : Adjust gamma, exposure, saturation, bleach and defog. (may cause clipping).
#define USE_VIBRANCE 0 //[0 or 1] Vibrance : Intelligently saturates (or desaturates if you use negative values) the pixels depending on their original saturation.
#define USE_CURVES 0 //[0 or 1] Curves : Contrast adjustments using S-curves.
#define USE_SEPIA 0 //[0 or 1] Sepia : Sepia tones the image.
#define USE_SKYRIMTONEMAP 0 //[0 or 1] Skyrim Tonemap: Applies color correction/tonemapping based on tonemappers of popular Skyrim ENB's.
#define USE_COLORMOOD 0 //[0 or 1] Color Mood: Applies a "mood" to the color, tinting mainly the dark colors.
#define USE_CROSSPROCESS 0 //[0 or 1] Cross Processing: Simulates wrong chemistry in color processing.
#define USE_FILMICPASS 1 //[0 or 1] Filmic Pass: Applies some common color adjustments to mimic a more cinema-like look.
#define USE_REINHARD 0 //[0 or 1] Reinhard: This is the Reinhard tonemapping shader, if you are interested, google how it works.
#define USE_REINHARDLINEAR 0 //[0 or 1] Reinhard: Reinhard mixed with some linear tonemapping.
#define USE_COLORMOD 0 //[0 or 1] Colormod: Contrast, Saturation and Brightness ported from colormod.asi.
#define USE_SPHERICALTONEMAP 0 //[0 or 1] Spherical Tonemap: Another approach on tonemapping, uses some sphere algorithms.
#define USE_HPD 0 //[0 or 1] Haarm Peter Duiker Filmic Tonemapping: Tonemapping used in Watch Dogs, ripped from the Watch Dogs shaders themselves.
#define USE_FILMICCURVE 0 //[0 or 1] Filmic Curve: Improved version of the well-known Uncharted 2 filmic curve, first seen in iCEnhancer 0.3.
#define USE_WATCHDOG_TONEMAP 0 //[0 or 1] Watch Dogs Tonemap: Enables one of the numerous watch dogs tonemapping algorithms. No tweaking values.
#define USE_SINCITY 0 //[0 or 1] Sin City: Effect from the movie "Sin City" - everything else than red is grey.
#define USE_COLORHUEFX 0 //[0 or 1] Color Hue FX: Desaturates everything but colors from a fixed hue mid and the range around it. Similiar to Sin City but much better. Thanks, prod80!
//LIGHTING
#define USE_LENSDIRT 0 //[0 or 1] Lensdirt: Simulates a dirty camera lens. IMPORTANT: bloom threshold and amount have influence on the intensity of the dirt!
#define USE_GAUSSIAN_ANAMFLARE 0 //[0 or 1] Gaussian Anamflare: Applies a horizontal light beam to bright pixels.
#define USE_BLOOM 0 //[0 or 1] Bloom: Makes bright lights bleed their light into their surroundings. NOT the SweetFX way to do bloom but a more proper way.
#define USE_LENZFLARE 0 //[0 or 1] Lenz Flare: Boris Vorontsov's Skyrim Lensflare with custom offsets, ported to MasterEffect.
#define USE_CHAPMAN_LENS 0 //[0 or 1] Chapman's lensflare: Simple lensflare shader with one big halo.
#define USE_GODRAYS 0 //[0 or 1] Godrays: Adds some light rays rotating around screen center.
#define USE_ANAMFLARE 0 //[0 or 1] Anamorphic Lensflare: adds some horizontal light flare, simulating the use of an anamorphic lens while recording.
//DEPTH BASED
#define USE_AMBIENTOCCLUSION 0 //[0 or 1] Ambient Occlusion: Enables physically incorrect shading that most newer gen games use. Multiple algorithms available.
#define USE_DEPTHOFFIELD 0 //[0 or 1] Depth of Field: Simulates out of focus blur of a camera. Multiple algorithms available.
//IMAGE ENHANCEMENTS
#define USE_SHARPENING 1 //[0 or 1] Sharpen: Sharps the image but may increase aliasing
#define USE_FISHEYE_CA 0 //[0 or 1] Fisheye lens & Chromatic Abberation: Adds some RGB shift in colors and distorts image to look like the "fisheye" effect.
#define USE_GRAIN 0 //[0 or 1] Grain: Adds some image grain, looks like when a TV has no signal.
#define USE_EXPLOSION 0 //[0 or 1] Explosion : Scatters the pixels, making the image look fuzzy.
#define USE_SMAA 0 //[0 or 1] SMAA Anti-aliasing : Smoothens jagged lines using the SMAA technique.
#define USE_HEATHAZE 0 //[0 or 1] Heat Haze: Convection in heated air causes the temperature of the air to vary and causes a shimmery effect that distorts whatever is behind.
//OVERLAYS
#define USE_HD6_VIGNETTE 0 //[0 or 1] HeliosDoubleSix Vignette: Adds some advanced vignette (darkening shader) to lead focus to screen center
#define USE_COLORVIGNETTE 0 //[0 or 1] Boris Vorontsov Vignette: Simple colorable version of vignette, darkens/tints the image at the corners
#define USE_BORDER 1 //[0 or 1] Border: Can be used to create letterbox borders around the image.
#define USE_MOVIEBARS 0 //[0 or 1] Movie Bars: blackens the image on the top and bottom, simulating a higher aspect ratio. Default set to 21:9 aspect ratio.
/*==============================================================================*\
| EFFECT PARAMETERS - COLOR |
\*==============================================================================*/
//CARTOON
#define CartoonPower 4.5 //[0.1 to 10.0] Amount of effect you want.
#define CartoonEdgeSlope 1.5 //[0.1 to 8.0] Raise this to filter out fainter edges. You might need to increase the power to compensate. Whole numbers are faster.
//LEVELS
#define Levels_black_point 5 //[0 to 255] The black point is the new black - literally. Everything darker than this will become completely black. Default is 16.0
#define Levels_white_point 235 //[0 to 255] The new white point. Everything brighter than this becomes completely white. Default is 235.0
//TECHNICOLOR
#define ColStrengthR 0.2 //[0.05 to 1.0] Color Strength of Red channel. Higher means darker and more intense colors.
#define ColStrengthG 0.2 //[0.05 to 1.0] Color Strength of Green channel. Higher means darker and more intense colors.
#define ColStrengthB 0.2 //[0.05 to 1.0] Color Strength of Blue channel. Higher means darker and more intense colors.
#define TechniBrightness 1.0 //[0.5 to 1.5] Brightness Adjustment, higher means brighter image.
#define TechniStrength 1.0 //[0.0 to 1.0] Strength of Technicolor effect. 0.0 means original image.
#define TechniSat 0.7 //[0.0 to 1.5] Additional saturation control since technicolor tends to oversaturate the image.
//SWEETFX TECHNICOLOR
#define TechniAmount 0.4 //[0.00 to 1.00] Amount of color change you want
#define TechniPower 4.0 //[0.00 to 8.00] Power of color change
#define redNegativeAmount 0.88 //[0.00 to 1.00] controls for different technicolor power on the respective color channels
#define greenNegativeAmount 0.88 //[0.00 to 1.00]
#define blueNegativeAmount 0.88 //[0.00 to 1.00]
//DPX
#define DPXRed 8.0 //[1.0 to 15.0] Amount of DPX applies on Red color channel
#define DPXGreen 8.0 //[1.0 to 15.0] ""
#define DPXBlue 8.0 //[1.0 to 15.0] ""
#define DPXColorGamma 2.5 //[0.1 to 2.5] Adjusts the colorfulness of the effect in a manner similar to Vibrance. 1.0 is neutral.
#define DPXSaturation 3.0 //[0.0 to 8.0] Adjust saturation of the effect. 1.0 is neutral.
#define DPXRedC 0.36 //[0.60 to 0.20]
#define DPXGreenC 0.36 //[0.60 to 0.20]
#define DPXBlueC 0.34 //[0.60 to 0.20]
#define DPXBlend 0.2 //[0.00 to 1.00] How strong the effect should be.
//LIFTGAMMAGAIN
#define RGB_Lift float3(1.000, 1.000, 1.000) //[0.000 to 2.000] Adjust shadows for Red, Green and Blue.
#define RGB_Gamma float3(1.000, 2.000, 1.000) //[0.000 to 2.000] Adjust midtones for Red, Green and Blue
#define RGB_Gain float3(1.000, 1.000, 1.000) //[0.000 to 2.000] Adjust highlights for Red, Green and Blue
//TONEMAP
#define Gamma 1.000 //[0.000 to 2.000] Adjust midtones. 1.000 is neutral. This setting does exactly the same as the one in Lift Gamma Gain, only with less control.
#define Exposure 0.000 //[-1.000 to 1.000] Adjust exposure
#define Saturation 0.000 //[-1.000 to 1.000] Adjust saturation
#define Bleach 0.000 //[0.000 to 1.000] Brightens the shadows and fades the colors
#define Defog 0.000 //[0.000 to 1.000] How much of the color tint to remove
#define FogColor float3(0.00, 0.00, 2.55) //[0.00 to 2.55, 0.00 to 2.55, 0.00 to 2.55] What color to remove - default is blue
//VIBRANCE
#define Vibrance 1.15 //[-1.00 to 1.00] Intelligently saturates (or desaturates if you use negative values) the pixels depending on their original saturation.
#define Vibrance_RGB_balance float3(1.00, 1.00, 1.00) //[-10.00 to 10.00,-10.00 to 10.00,-10.00 to 10.00] A per channel multiplier to the Vibrance strength so you can give more boost to certain colors over others
//CURVES
#define Curves_mode 2 //[0|1|2] Choose what to apply contrast to. 0 = Luma, 1 = Chroma, 2 = both Luma and Chroma. Default is 0 (Luma)
#define Curves_contrast 1.15 //[-1.00 to 1.00] The amount of contrast you want
// -- Advanced curve settings --
#define Curves_formula 2 //[1|2|3|4|5|6|7|8|9|10] The contrast s-curve you want to use.
//1 = Sine, 2 = Abs split, 3 = Smoothstep, 4 = Exp formula, 5 = Simplified Catmull-Rom (0,0,1,1), 6 = Perlins Smootherstep
//7 = Abs add, 8 = Techicolor Cinestyle, 9 = Parabola, 10 = Half-circles.
//Note that Technicolor Cinestyle is practically identical to Sine, but runs slower. In fact I think the difference might only be due to rounding errors.
Hi, when I put everything there, works ok but no border and looks too oversaturated and though I put the MasterEffect.h doesn't work :\
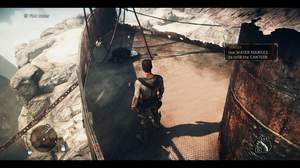
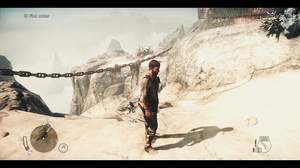
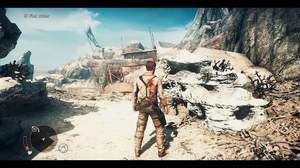
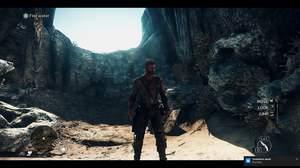
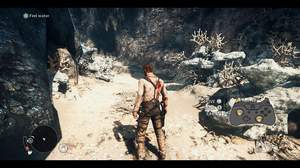
C:\Program Files (x86)\Steam\steamapps\common\Mad Max
Uhhh I made the witcher 3 mod also? But this is not it.
wtf this is witcher 3 mod
Open your mad max folder, then open the mastereffect text file in notepad, search for border, and change the value from 1 to 0
how to remove frame at the top and bottom?
Awesome!! Thank you = )
Crap!! Sorry about that I didn't fully understand how the upload process worked. Uploaded!! Follow instructions ty"!
I really like the look of this! Where's the MasterEffect.h text/file?